
Reusable blocks are a great feature in WordPress that can help speed up your content creation process. In this step-by-step guide, we will walk you through creating a reusable block, changing its background color, using it on other pages or posts, and managing your reusable blocks. Let’s get started.
1. Login to your WordPress admin dashboard.
2. Once logged in, navigate to the page or post where you want to create your reusable block. You can either create a new page/post or edit an existing one.
3. On the page or post editor screen, click on the “+” button to add a new block.

4. In the block options, choose any block you want to use as the basis for your reusable block. For example, you can select a paragraph block by clicking on “Paragraph” in the “Common Blocks” section.
5. After adding the block, customize it as you see fit. For our example, let’s change the background color. In the block options, you will see a “Background color” setting. Click on it and select the desired color.
6. With the block selected, click on the three-dot icon in the block options and choose “Add to Reusable Blocks.”
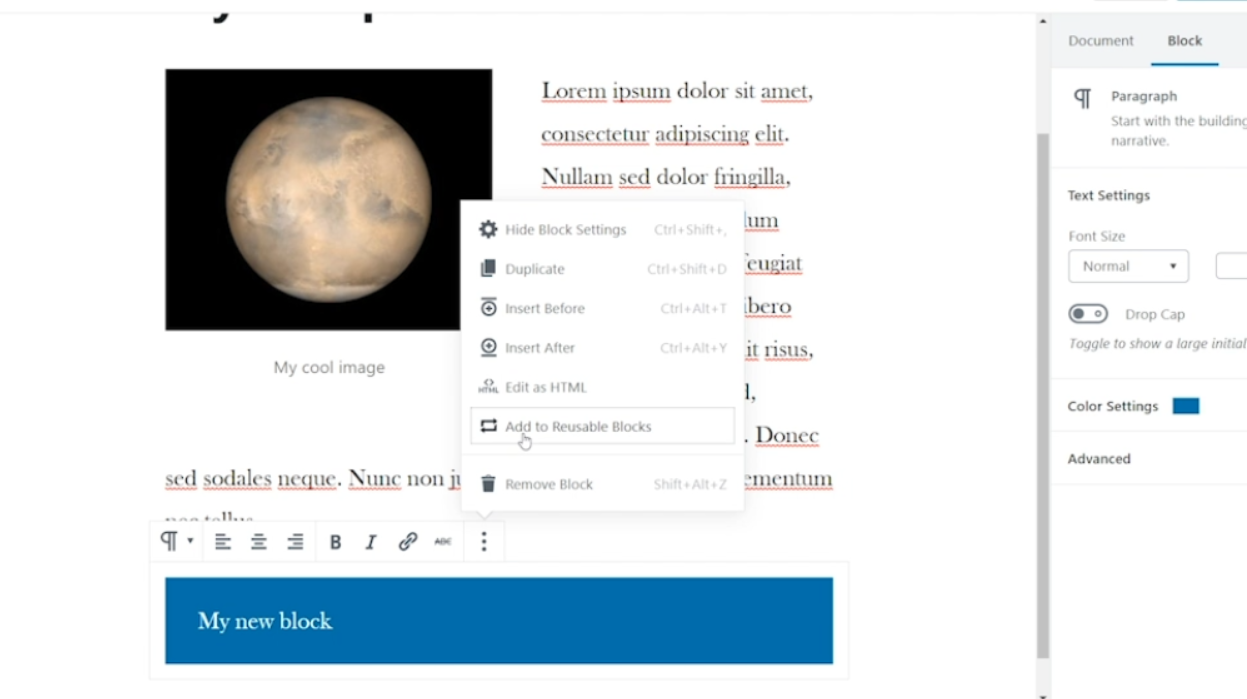
7. A popup window will appear, asking you to give your block a name. Enter a unique and descriptive name, such as “Blue Block,” and click on “Save.” Your block is now saved as a reusable block.
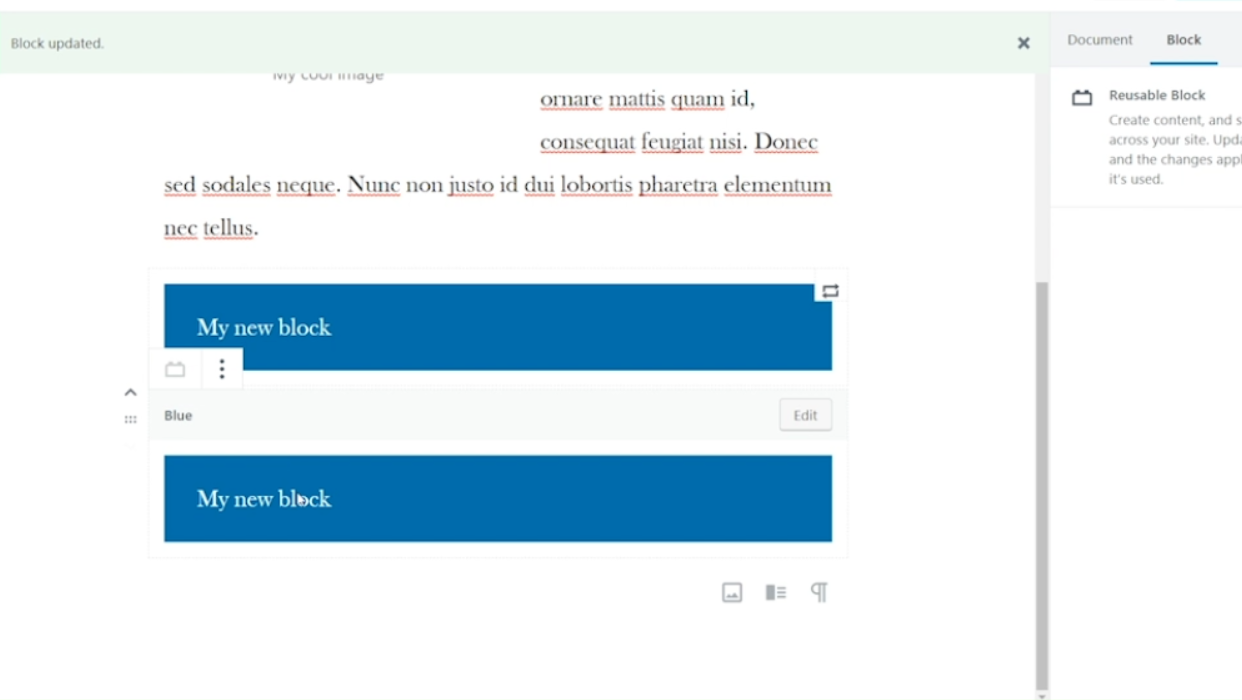
8. To use your reusable block on another page or post, simply add a new block as you did in step 3. This time, instead of selecting a block type, scroll down the block options panel until you see the “Reusable” tab.
9. Click on the “Reusable” tab, and you will find the list of all your reusable blocks. Choose the block you want to use, in our case, “Blue Block.”
10. The block will be added to the page or post, and you can customize it further if needed.
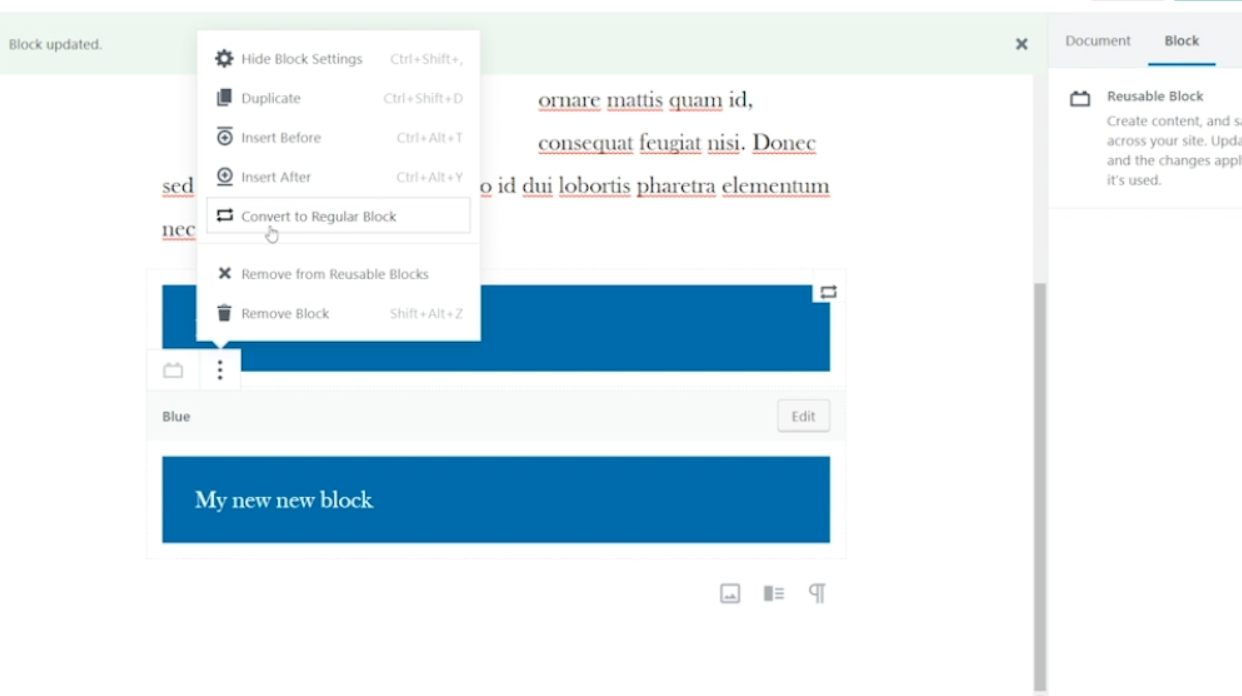
11. If you want to make changes to a specific instance of your reusable block without affecting others, go to the block options panel, and click on the three-dot icon. From the options that appear, select “Convert to Regular Block.” This will convert the reusable block to a regular block, independent of the original reusable block.
12. For more complex reusable blocks that contain multiple types of blocks, hold the shift key and select all the blocks you want to include. Then, follow steps 6 to 7 to save them as a reusable block.
13. To manage your reusable blocks, go to the page or post where you created the blocks and click on the three-dot icon in the block options. From the options that appear, select “Manage All Reusable Blocks.”
14. You will be taken to the “Reusable Blocks” section, where you can see a list of all your reusable blocks. From here, you can edit, delete, or export your blocks for use on another site.
That’s it! You now have a step-by-step guide on how to create, use, and manage reusable blocks in WordPress. Utilizing reusable blocks can save you time and effort when it comes to creating content on your website.
Leave a Reply