[affiliate-disclaimer]
This is a detailed, step by step guide to buying web hosting for your business website. Just follow these simple steps and you will soon have your hosting to setup your wordpress website. Click the images to enlarge them.
- Click this link to open Bluehost.com in a new window (so you can follow along in this one)
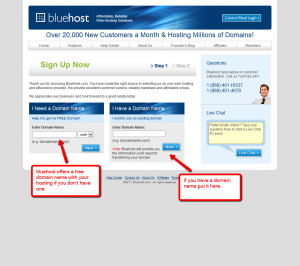
- On the main screen click the “Sign Up Now” button to get started.

- If you don’t already have a domain name bluehost offers a free domain with hosting. You can just put it in the “I need a domain name” box. If you have already purchased a domain name enter it in the “I have a domain name” box and click the appropriate next button.

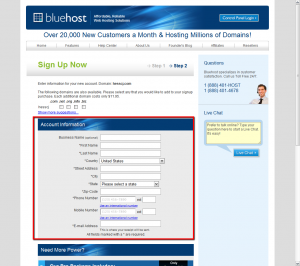
- Fill out the account information.

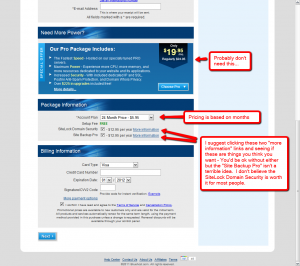
- For most sites I do not recommend the pro package
- Choose the number of months you want (affects price)
- I suggest clicking the two “more information” links and seeing if these are things you think you want – You’d be OK without either but the “Site Backup Pro” isn’t a terrible idea. I don’t believe the SiteLock Domain Security is worth it for most people.

- Fill out the billing information and click next – you will receive an email that confirms your payment.
- Next you need to create your password. Click the “Create your password” link and select a password that meets the requirements written in red on the right. Then click “Change Password”.

- Now you can log in to your dashboard by putting your domain name in and your password and clicking login.

- You will be greeted with a “Welcome New User” screen.
- If you are ready, follow this guide to install wordpress.

Leave a Reply