This page is about how to actually buy a domain name. If you are looking for how to pick a good domain name, I will write that as a blog post in the next couple of weeks (edit: How to Pick a Domain Name) If you have a domain name you want and you are ready to purchase it, follow these simple steps (Click the images to enlarge them):
If you are going to buy web hosting from bluehost.com you can get one free domain name as part of your web hosting so this step may not be necessary. If you want multiple domain names or multiple extensions (.com/.net/.org) then I would suggest buying them all from Namecheap as that will be the easiest to keep them all up to date and working.
- Click this link to go to Namecheap.com (will open in a new window)
- Search for the domain name(s)
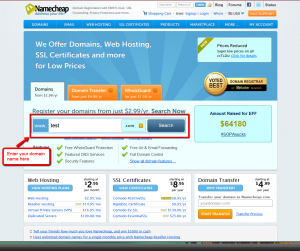
- If it is available check the checkbox (if it isn’t available check out my post on how to pick a good domain name)
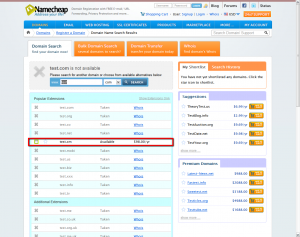
- Add the domain name to the shopping cart using the “Add to Cart” button
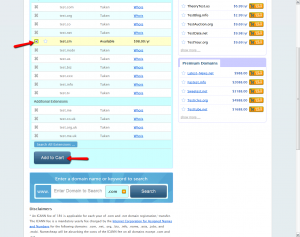
- For simplicity I recommend removing the free WhoisGuard (on renewals it won’t be free but if you want your contact information private you can keep it checked.)
- If you want you can increase the number of years to 2 or more (this looks better to Google and other search engines)
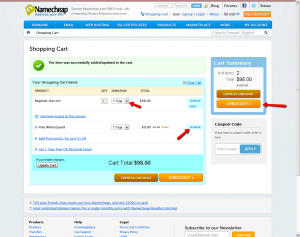
- Click the checkout button
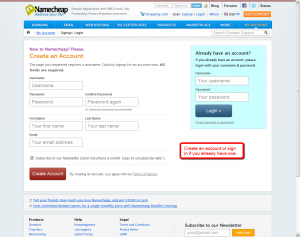
- Create an account.
- Enter the registration contact information (if it is the same for all 3 enter it once and then click the “Copy Information From: ” link that corresponds to the one you filled out (most likely “Registrant Contact”).

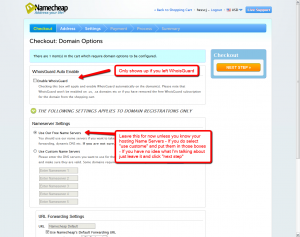
- If you left WhoisGuard on check to enable it, otherwise it won’t show up.
- Unless you know your name servers leave it set to use the free ones. (If you have or will be purchasing your hosting from bluehost.com you can click the “use custom name servers” option and put ns1.bluehost.com in the first box and ns2.bluehost.com in the second.)
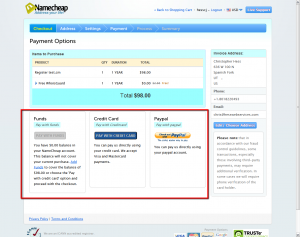
- Select your payment method and pay for your domain name(s)
You should receive emails from Namecheap when your order goes through.
If you get confused or if there is a step that is missing please let me know.

Leave a Reply