
The quick draft module, located in your WordPress dashboard, is a handy tool that allows you to quickly jot down your ideas for a post and save it as a draft for later refinement. Follow these steps to create a WordPress page or post using the quick draft module:
1. Log in to your WordPress website by entering your username and password on the login page.
2. Once logged in, you will be redirected to your WordPress dashboard. The dashboard is the control panel where you can manage all aspects of your website.
3. On the left-hand side of your dashboard, you will see a menu. Navigate to “Posts” and click on it. This will expand the sub-menu.
4. In the expanded sub-menu, click on “Add New.” This will take you to the post editor.
5. At the top of the post editor, you will find a module called “Quick Draft.” It usually appears on the right-hand side of your screen.
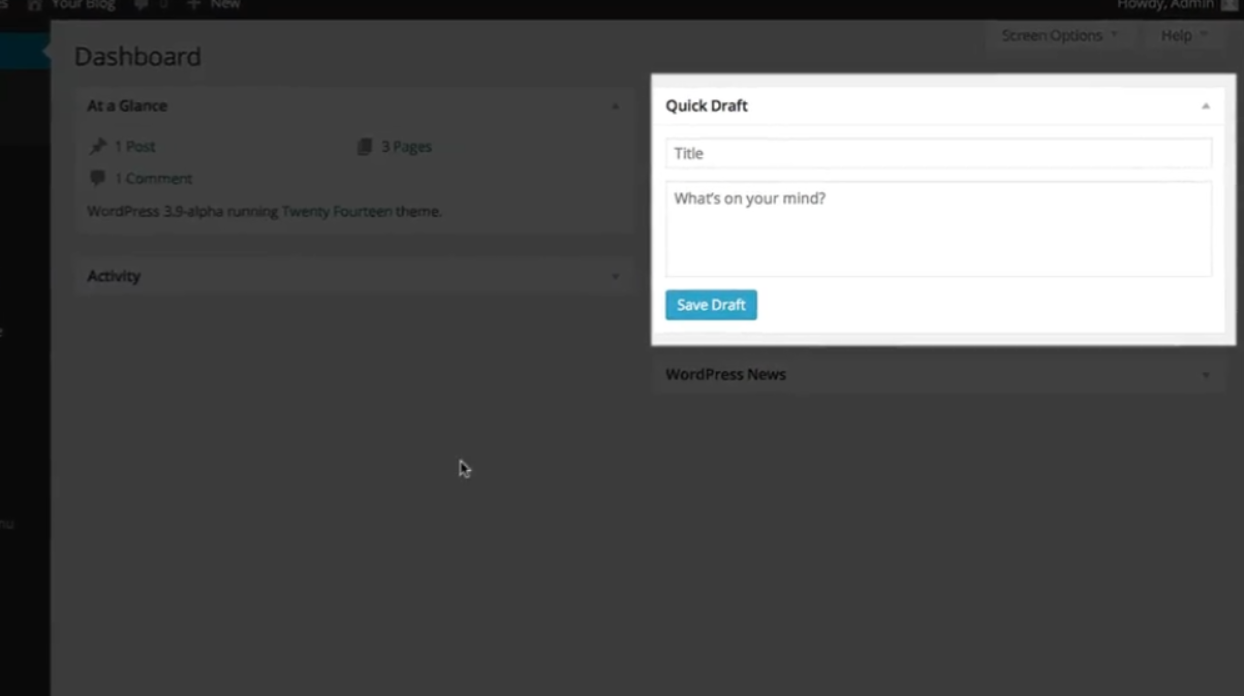
6. To create a new post, start by entering a title for your post in the “Add title” field. This should be a concise and descriptive title that accurately represents the content of your post.
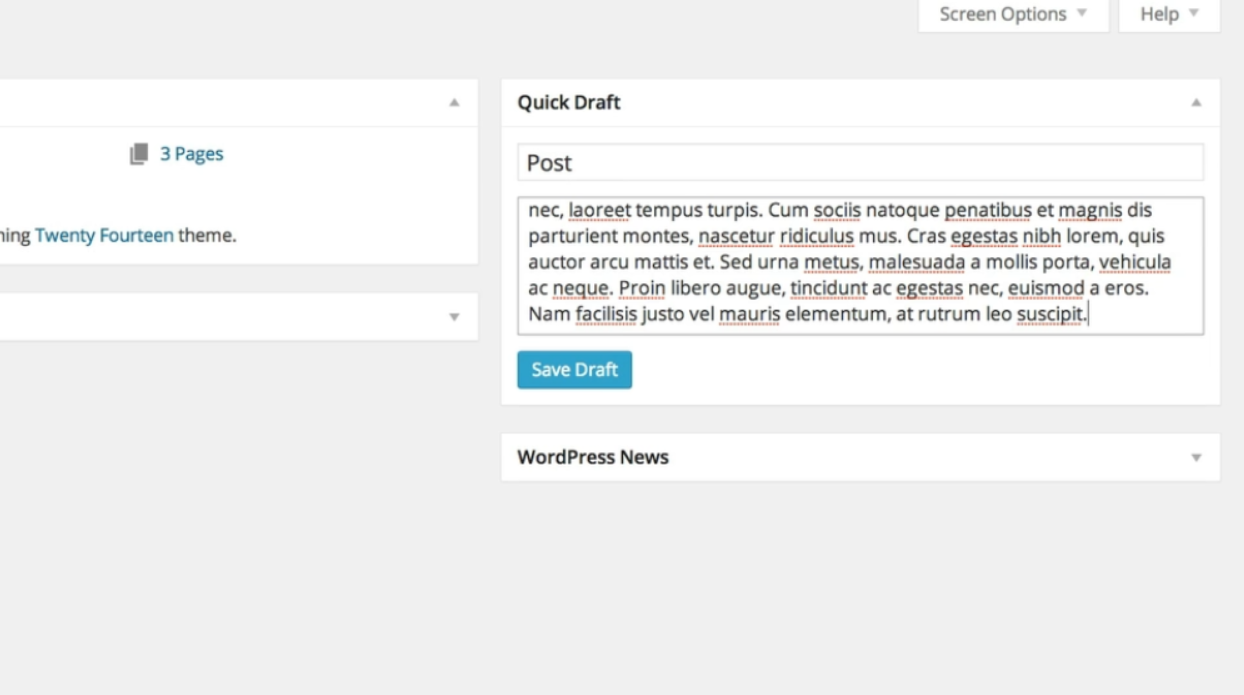
7. Once you have entered a title, move on to the “Content” section. Here, you can start writing the actual content of your post. Use the text editor to format your content and add styling if desired.
8. After you have entered your post content, click on the “Save Draft” button located within the Quick Draft module. This will save your post as a draft and allow you to continue working on it later.

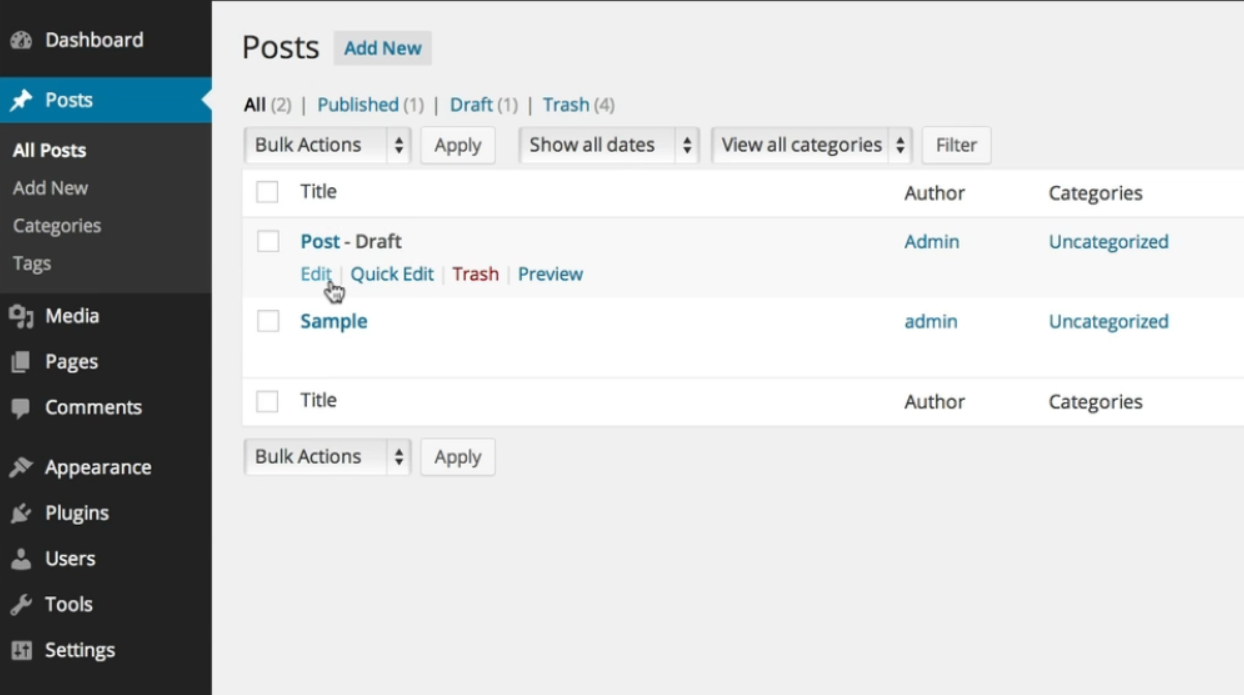
9. To access your saved draft, go back to the main dashboard menu and click on “Posts.”
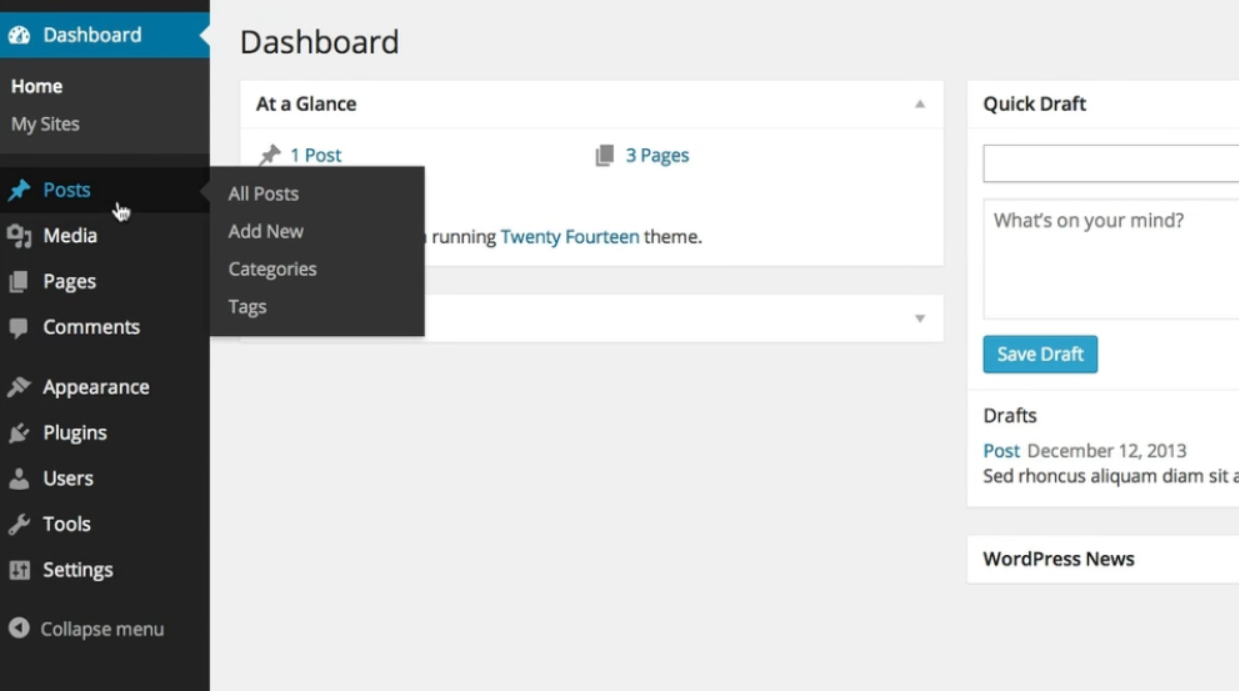
10. In the submenu that appears, click on “All Posts.” This will display a list of all your posts, including the one you just created as a draft.
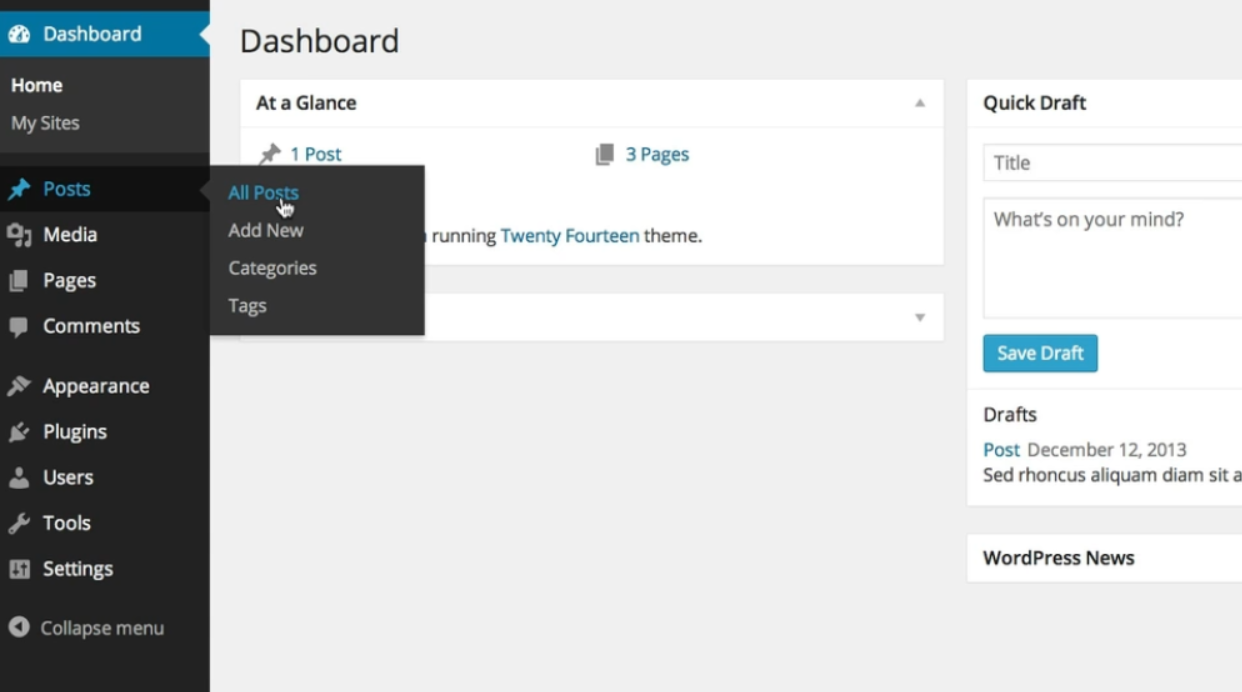
11. Locate your draft post in the list and click on its title. This will open the post editor, allowing you to make further edits or add additional content.
12. In the post editor, you can refine your post by modifying the content, adding media such as images or videos, assigning categories and tags to your post, and adjusting the post settings.
13. Once you are satisfied with your post, click on the “Publish” button to make it live on your website. You can also click on the “Preview” button to see how your post will appear to your visitors before publishing.
That’s it! You have successfully created a WordPress page or post using the quick draft module. Remember to regularly save your drafts and publish your posts to keep your website up-to-date with fresh content.
Leave a Reply