
Widgets are a great way to customize and enhance the functionality of your WordPress website. In this step-by-step guide, we’ll walk you through how to manage widgets on your site. Let’s get started:
1. Log in to your WordPress admin area by entering your username and password.
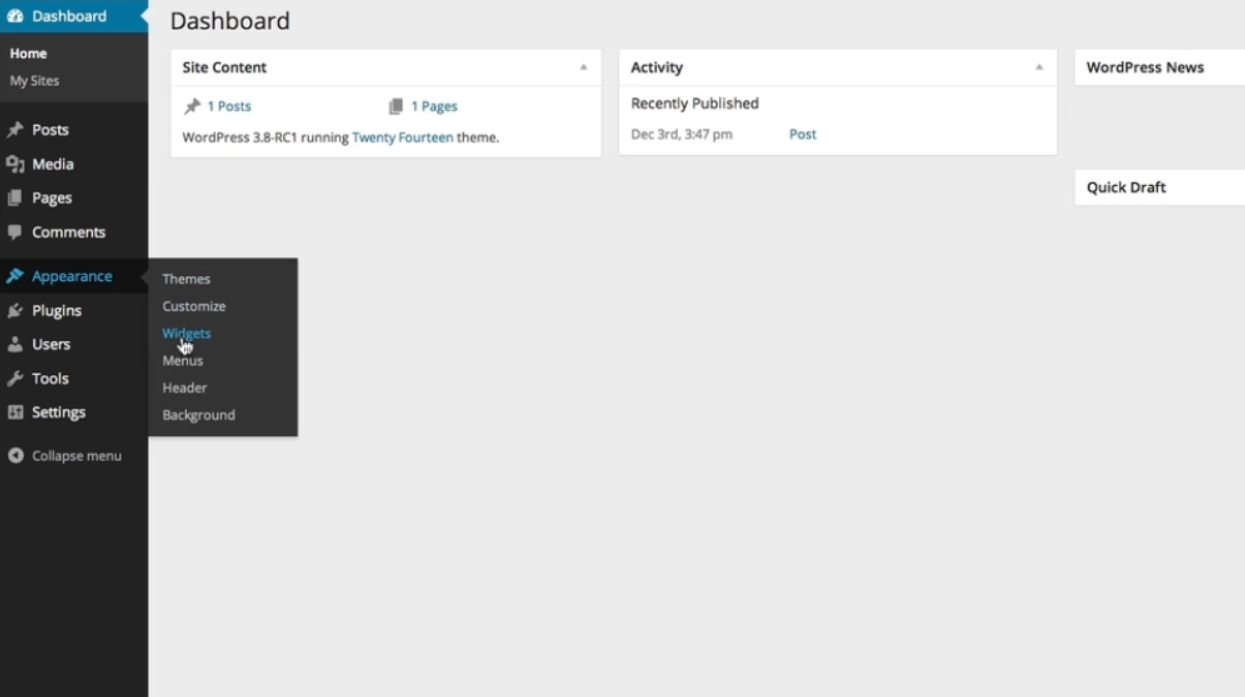
2. Once you’re logged in, you’ll be directed to the WordPress dashboard. On the left-hand side, you’ll see a menu. Scroll down and click on the “Appearance” tab.
3. From the Appearance menu, select “Widgets.” This will take you to the Widgets page.
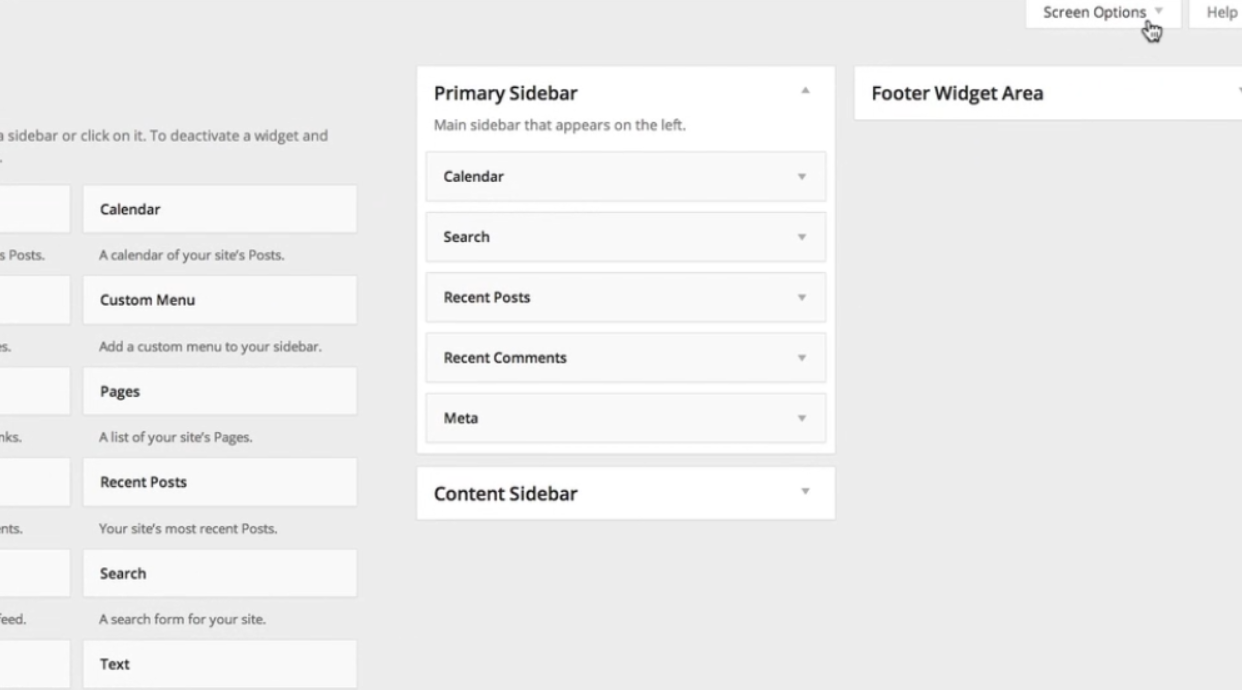
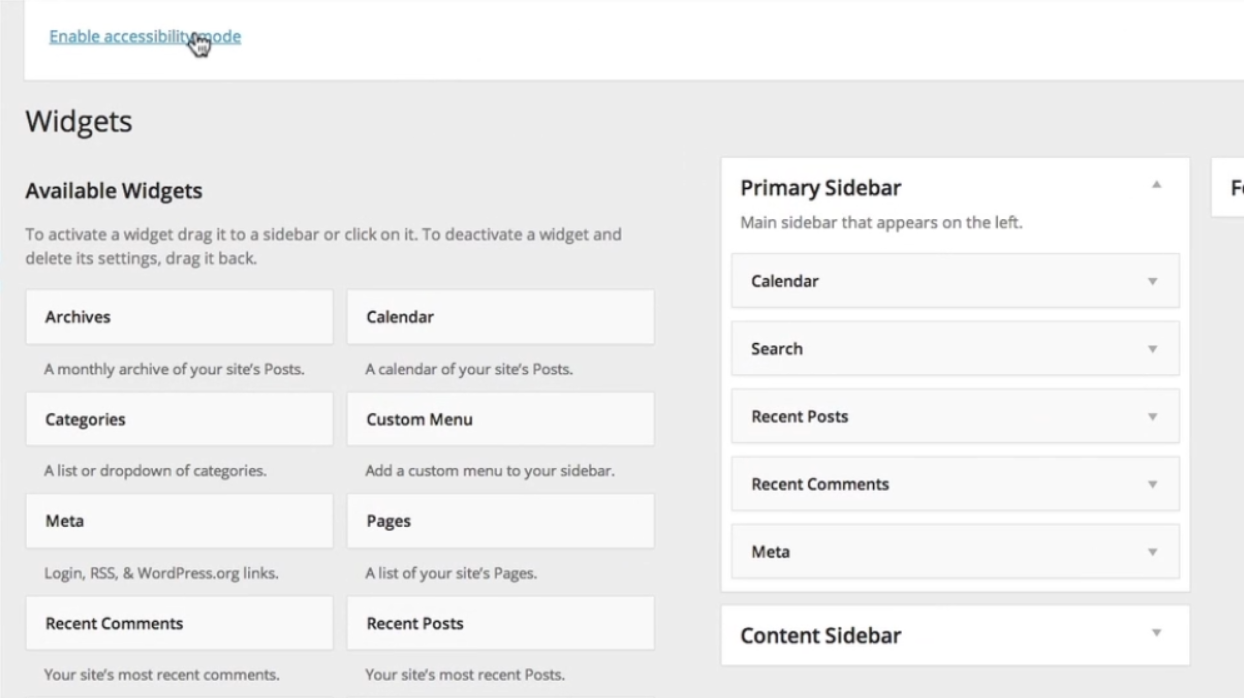
4. On the Widgets page, you’ll see two main sections: “Available Widgets” and “Widget Areas.” The Available Widgets section displays all the widgets currently available for you to use on your site. Each widget is listed by name, along with a basic description.
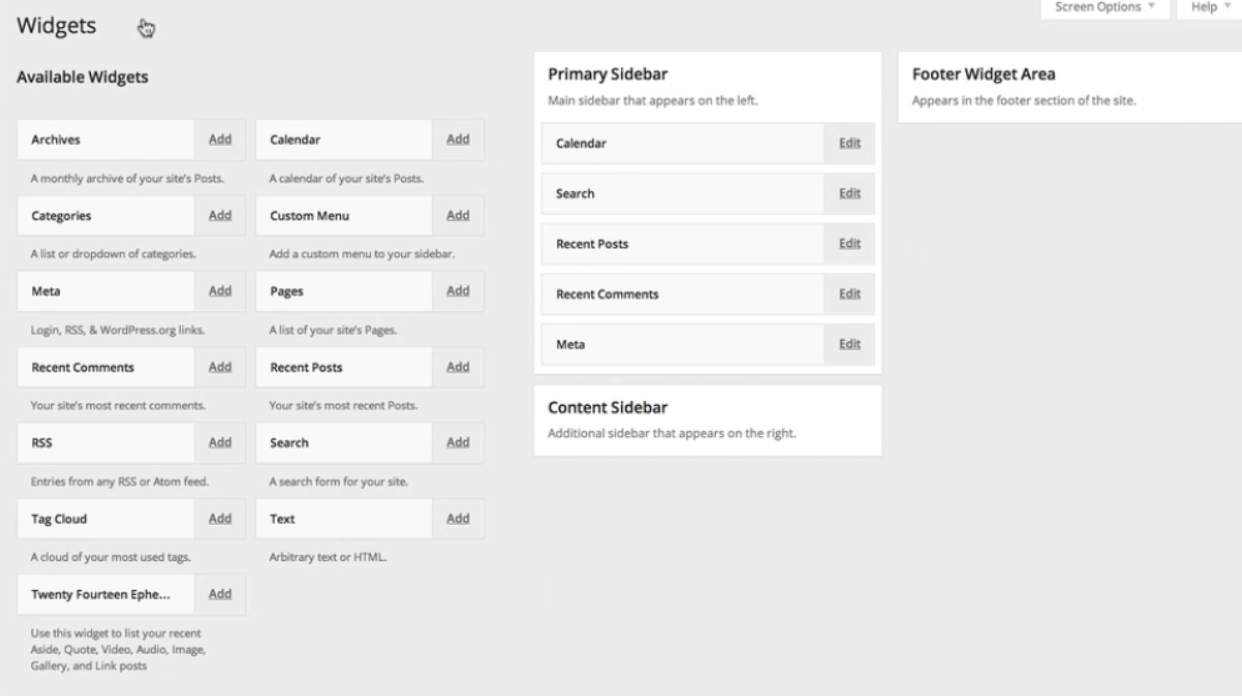
5. On the right side of your screen, you’ll find the Widget Areas. These areas represent the sidebar and footer sections of your site where you can place your widgets. They are usually labeled with names like “Sidebar,” “Footer,” or “Widgetized Area.”
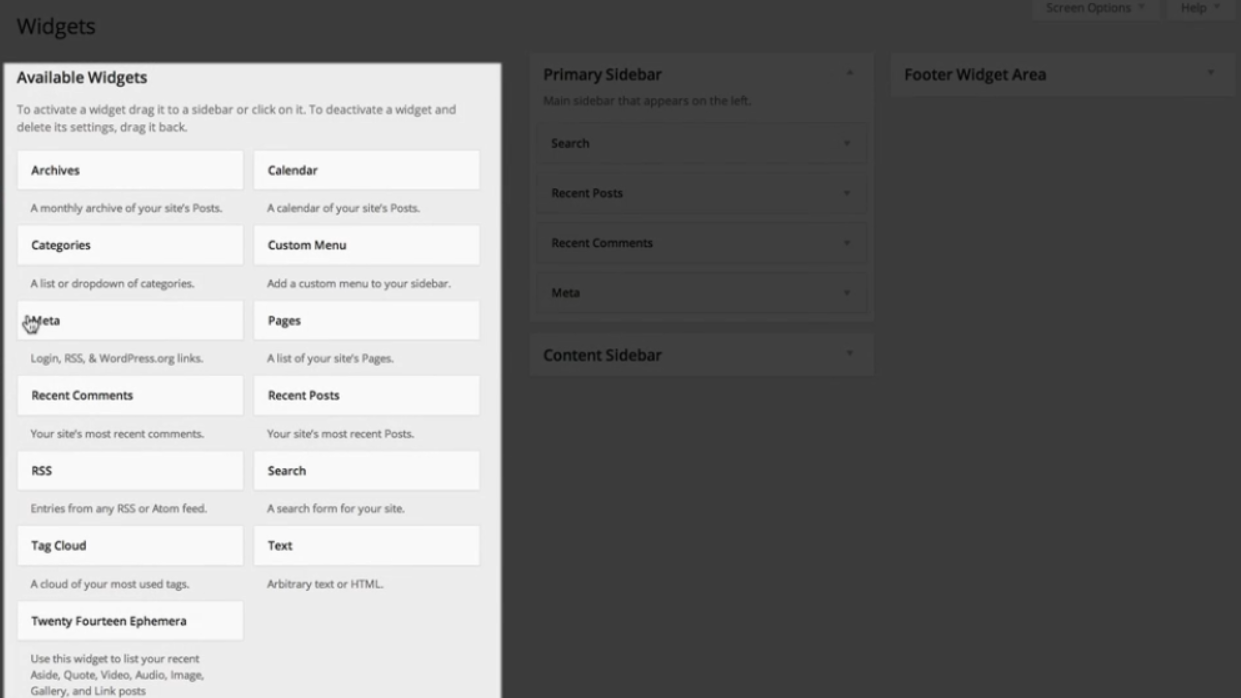
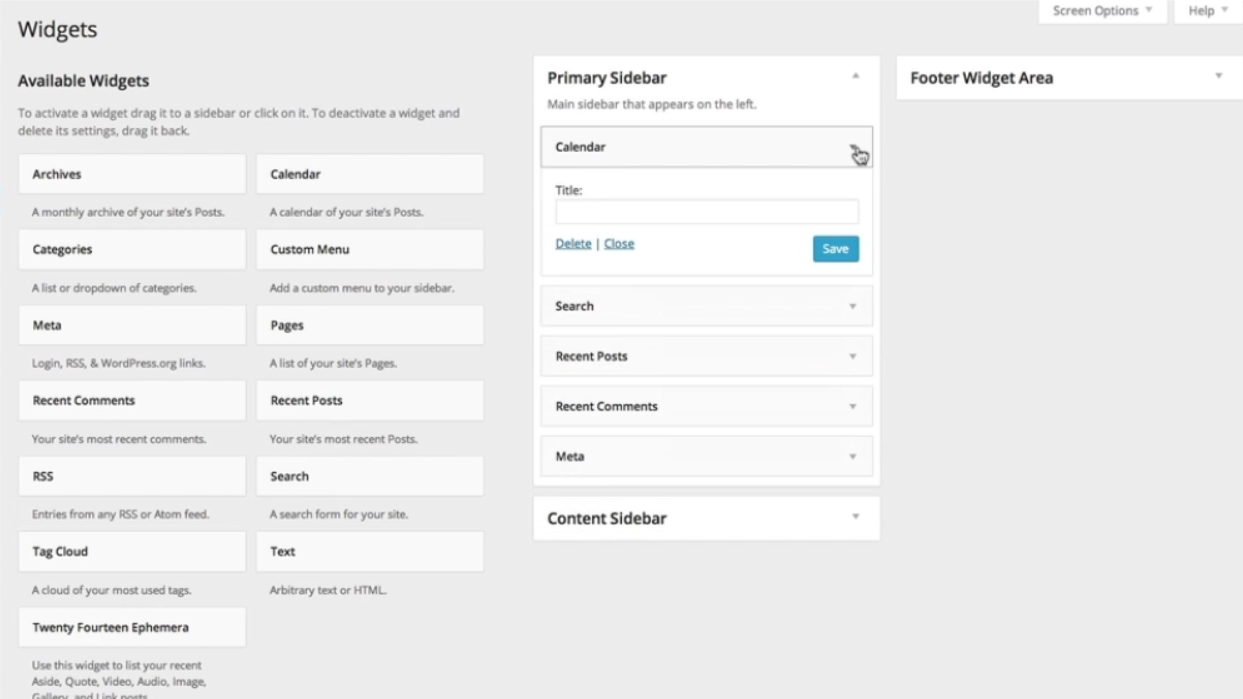
6. To add a widget, simply click and hold the widget you want to use from the Available Widgets section, then drag it over to the desired Widget Area on the right side of the screen. Release the mouse button to drop the widget.
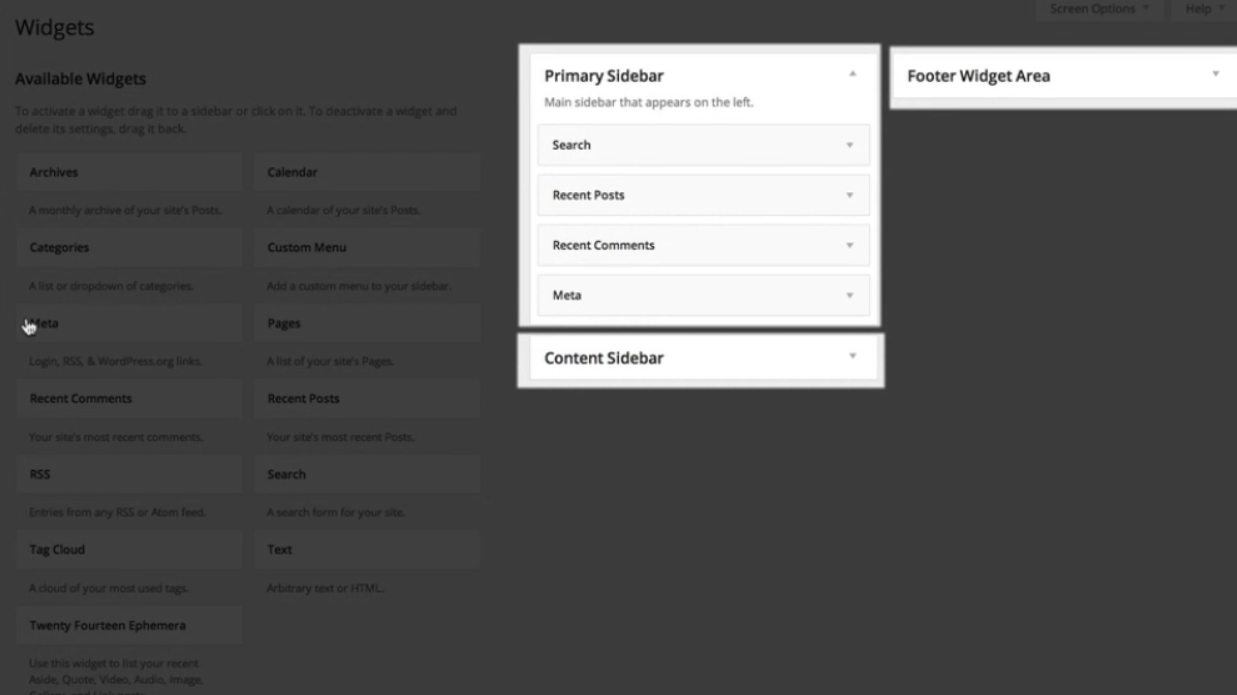
7. You can arrange the widgets within the Widget Areas by dragging and dropping them in the desired order.
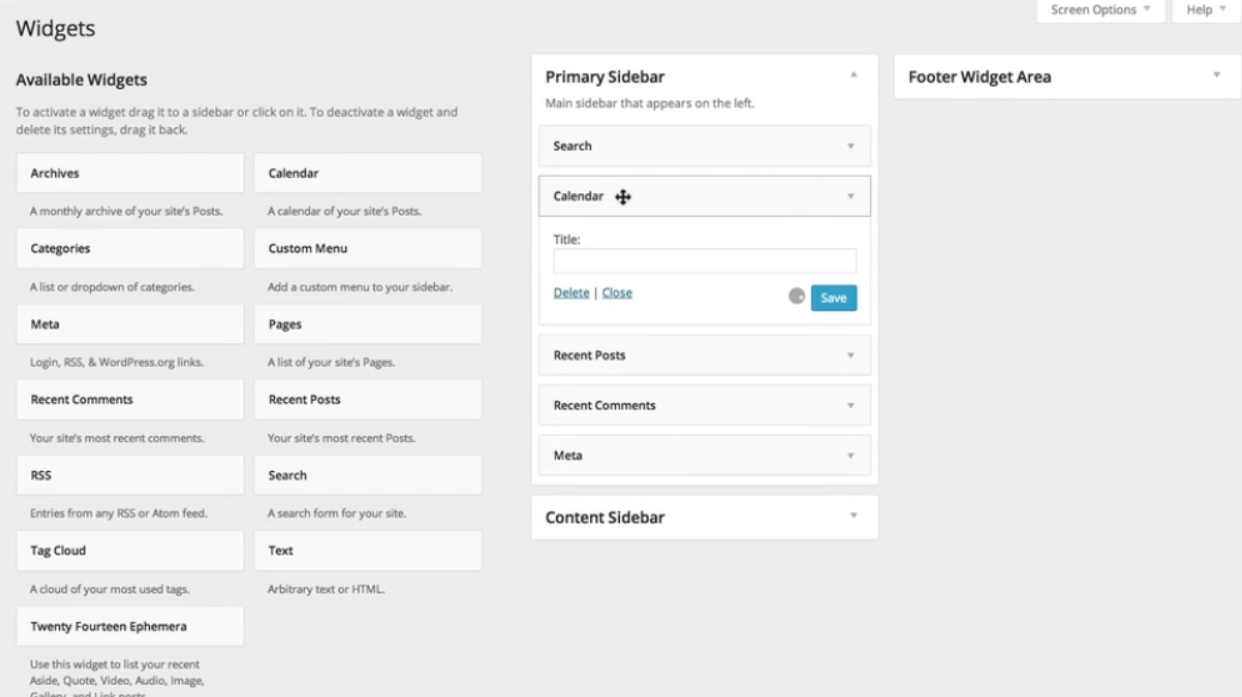
8. When you click the drop-down arrow on a widget, various options will appear. The specific options depend on the widget you select. You can customize the settings to meet your needs.
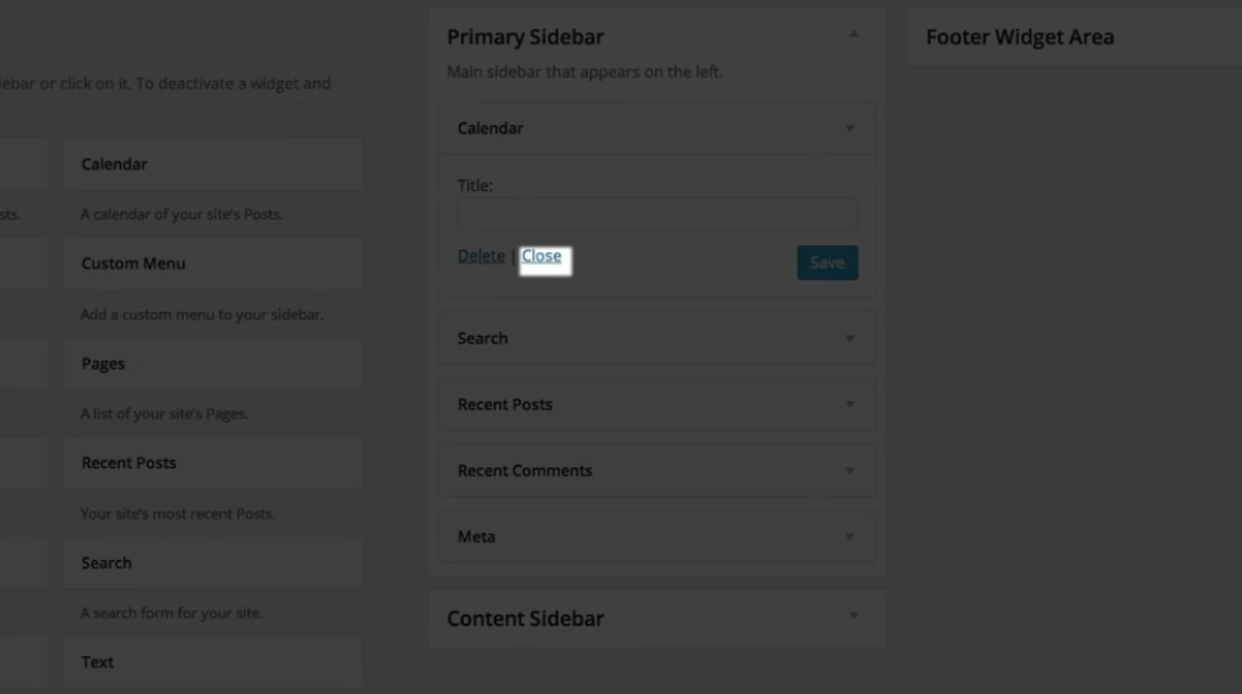
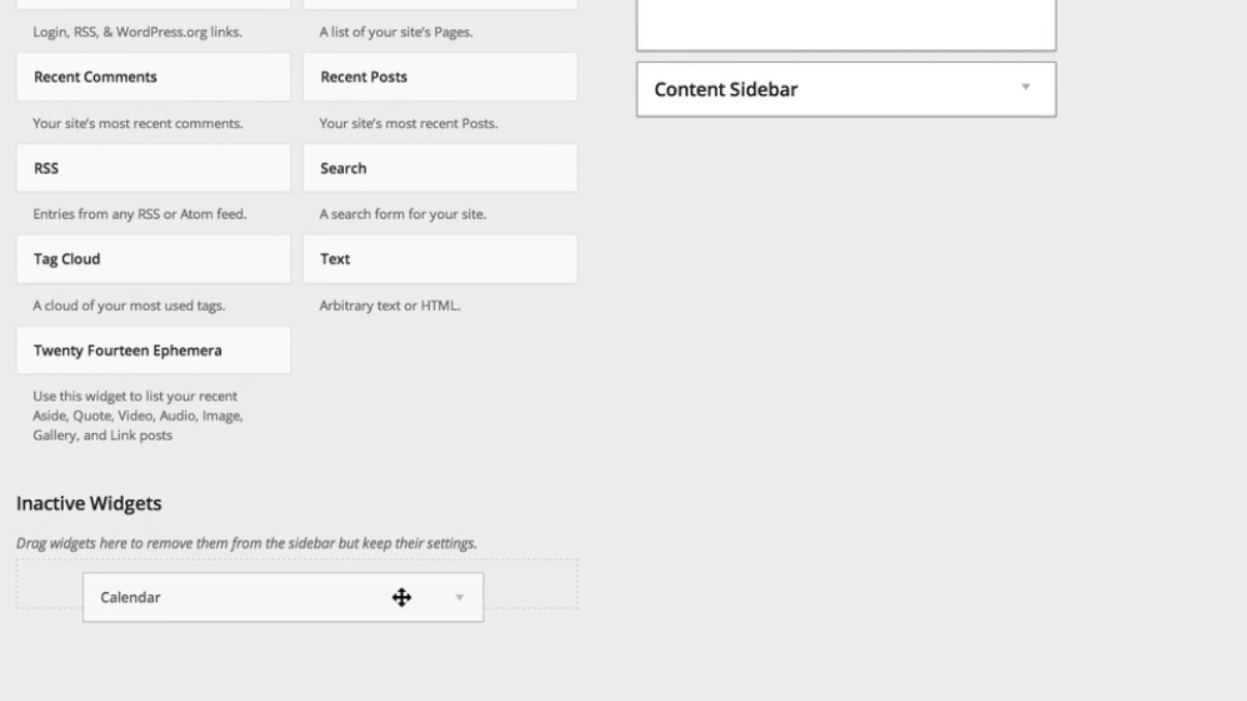
9. If you wish to remove a widget, you have a few options. Clicking “Close” will close the options panel without saving any changes. Clicking “Delete” will permanently remove the widget from your site. If you want to temporarily remove a widget without losing its settings, you can drag it to the “Inactive Widgets” section.
10. If you ever want to restore a widget that you’ve placed in the “Inactive Widgets” section, you can easily do so by dragging it back to one of the Widget Areas.
11. At the top of the page, you’ll notice a “Screen Options” tab. Clicking on it will reveal additional settings and options. For example, you can enable the “Accessibility Mode” to provide an alternative way to manage your widgets. You can disable accessibility mode by returning to the Screen Options and clicking the “Disable Accessibility Mode” button.
12. After you’ve made all the desired changes to your widgets, click on your site’s name in the admin bar at the top of the page to view your changes.
That’s it! You’ve successfully managed your widgets on your WordPress site. Now you can add, remove, and customize widgets to enhance your website’s functionality and appearance.
Leave a Reply