
If you ever need to change your password on WordPress, here is a step-by-step guide to help you through the process:
1. Log in to your WordPress dashboard. To do this, open your web browser and type in the URL of your website with “/wp-admin” at the end (e.g., www.yourwebsite.com/wp-admin). Press Enter.
– Note: You will need your username and password to access your WordPress dashboard. If you don’t have this information, please reach out to your website administrator or hosting provider.
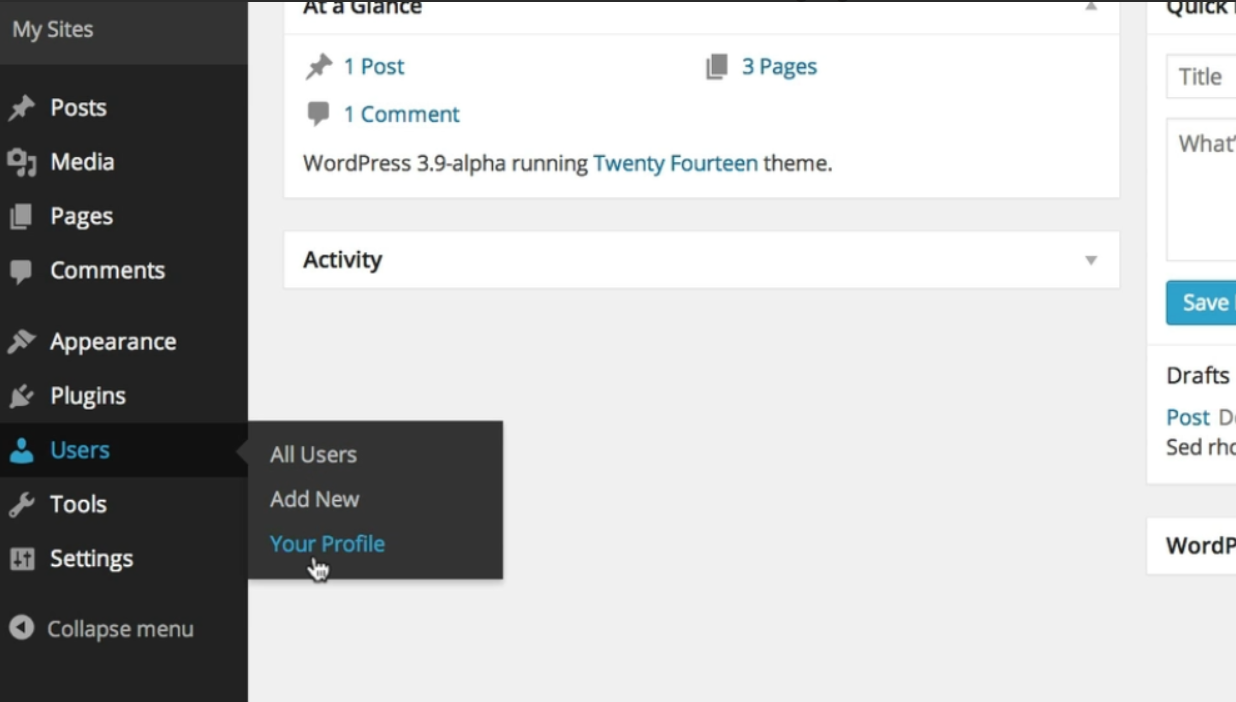
2. Once you’re logged in, you should be on the WordPress dashboard. Look for the “Users” tab on the left-hand side of the screen and hover over it with your mouse.
– A drop-down menu will appear. Click on “Your Profile” from the options presented.
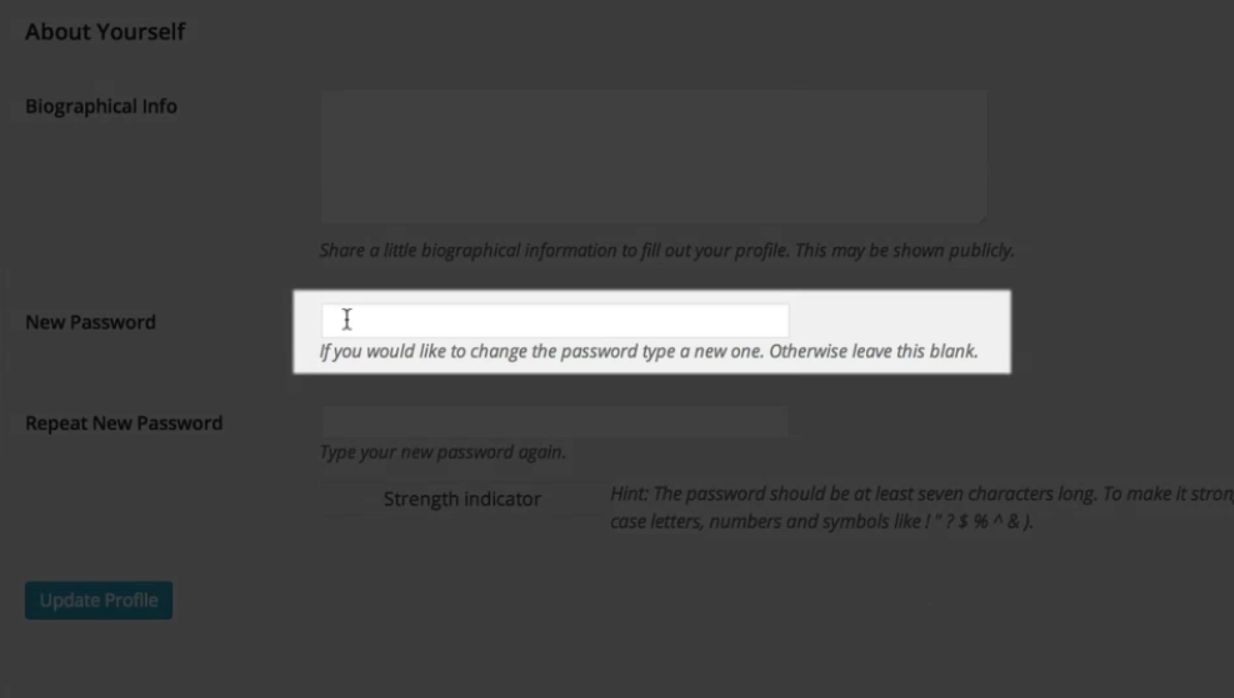
3. You will now be on your profile page. Scroll down until you reach the section labeled “Account Management.” Here, you will find the option to change your password.
4. In the “New Password” box, enter your desired new password. WordPress will provide a strength indicator to help you create a strong password. You can choose to follow their recommendations or create one of your own.
– It is generally recommended to use a combination of uppercase and lowercase letters, numbers, and special characters for a stronger password.
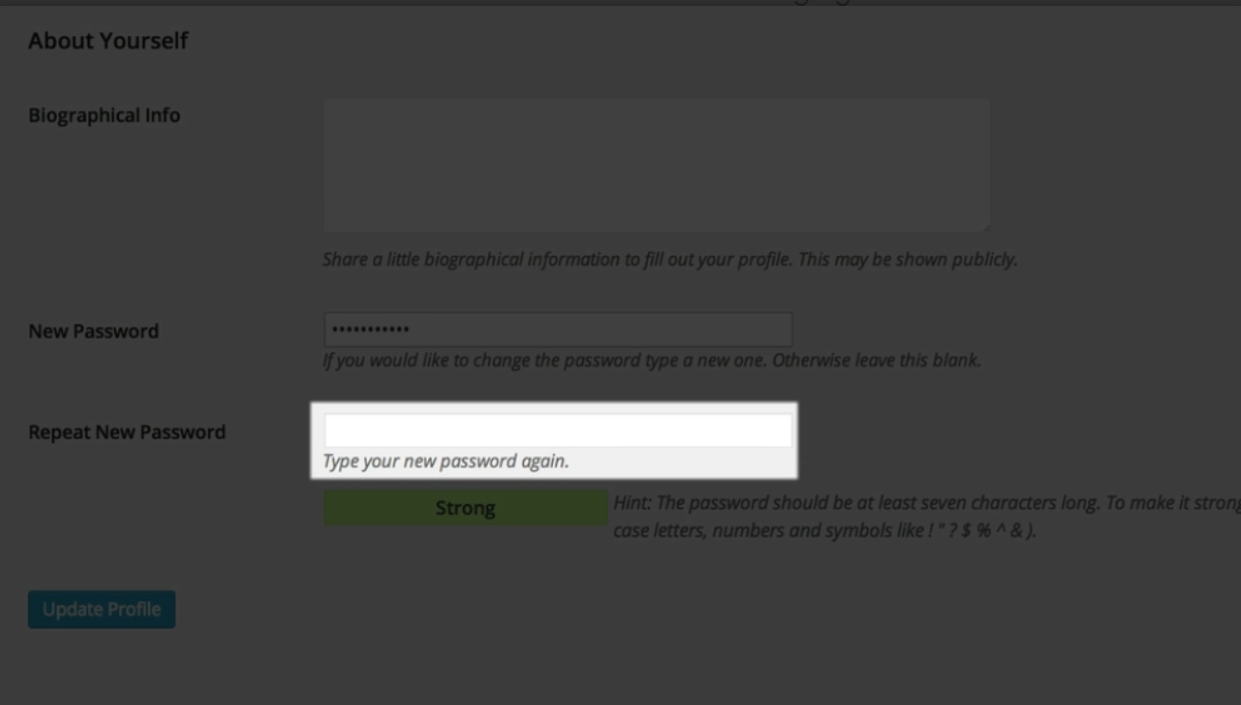
5. In the “Repeat New Password” box, type your new password again to confirm it.
6. Double-check that the new password you entered matches the one in the “Repeat New Password” box.
7. After verifying your new password, click on the “Update Profile” button located at the bottom of the page.
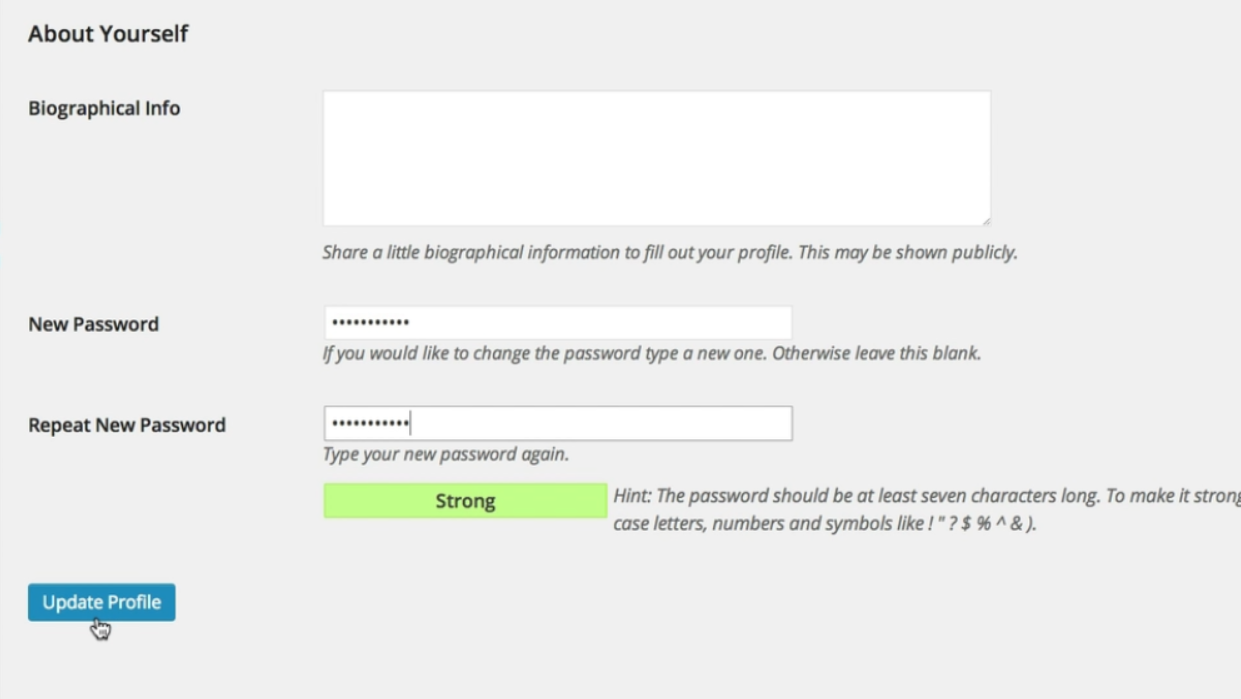
8. WordPress will process your password change request. You will see a confirmation message once your password has been successfully updated.
Congratulations! You have successfully changed your WordPress password. From now on, make sure to use your new password when logging in to your WordPress dashboard.
Leave a Reply